Permission
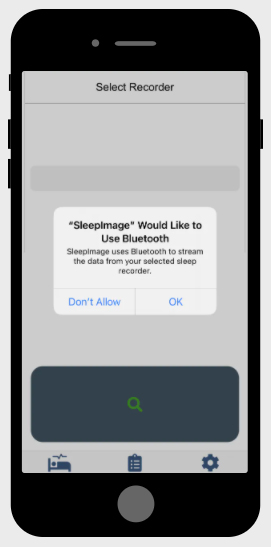
- Click OK to grant access to Bluetooth
Apple
Android
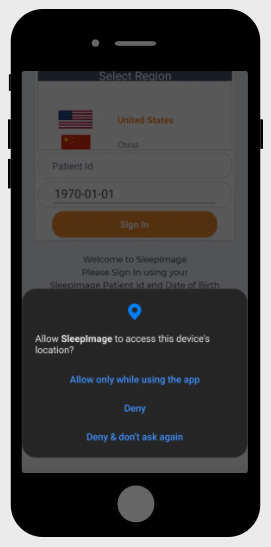
- Click "Allow only while using the app" to grant access to Bluetooth. The SleepImage App does not track your location.
Sign In
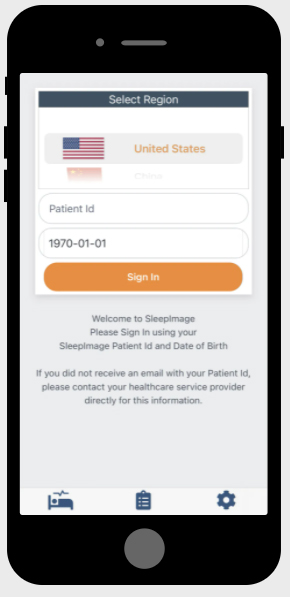
- Enter your Patient Id. If you did not receive an email with this information, please contact your healthcare service provider
- Enter your Date of Birth
Pair Recorder
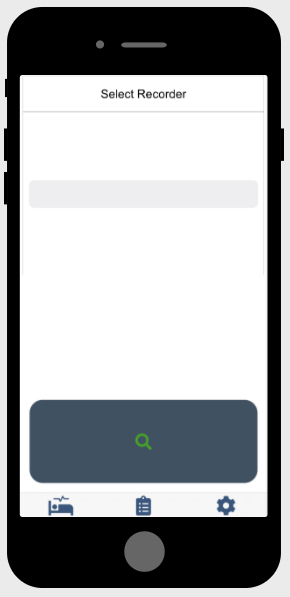
- Do not pair the recorder in the phone settings!
- Power on your recorder by inserting a finger into the sensor or clicking the power button
- Click the scan button on the screen (left)
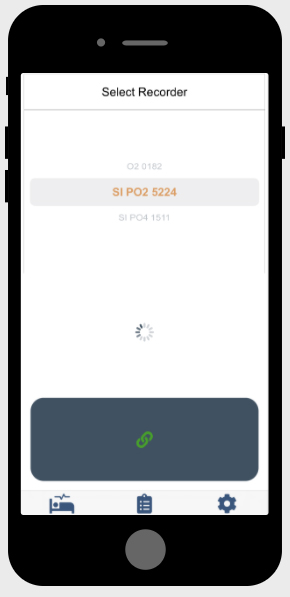
- Select your recorder and click the button on the screen (right)
- Power on your recorder by inserting a fingeraMake sure the recorder is fully charged before starting a recording into the sensor or clicking the power button
Start Recording
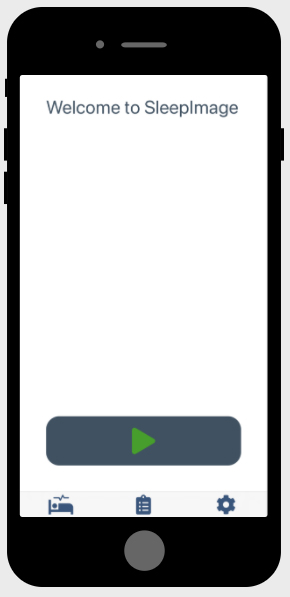
- Do not use other Bluetooth accessories, or other apps, during recording
- Power on your recorder by inserting a finger into the sensor or clicking the power button
- Keep your phone/tablet in close proximity and plugged in to power
- Click the start button
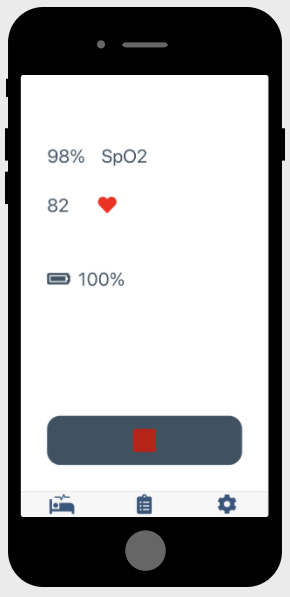
- Verify that the app is displaying SpO2 and Pulse Rate
Stop Recording

- If the screen on the left did not appear, see "Unexpected Behaviour" in Troubleshooting below
- Click the stop button
- Go to History tab
- Finished! Your study has been uploaded to your healthcare providers account. Contact them directly for further guidance.

Troubleshooting
If the SleepImage app does not appear in the Apple App Store or Google Play store on your device, make sure to search for “SleepImage”, or click the store badges at the top of this page. If you still can’t find the app, the most likely reason is an incompatible Android or iOS version.
If you cannot sign in to the app, first make sure the mobile device is connected to the internet and that there are no typos or spaces in the Patient Id. It is also possible that your Date of Birth was entered incorrectly in the SleepImage System. Please contact your healthcare service provider to verify your sign-in information.
If you paired the recorder in Bluetooth settings on the phone settings, unpair it first. Then, try the pairing process in the SleepImage App again.
Make sure Bluetooth is enabled, and that you have granted the necessary permissions to the SleepImage App. On iOS, go to Settings->SleepImage and enable the Bluetooth permission. On Android, go to Settings->Apps->Permissions->Location and select “Allow all the time”.
Make sure your phone/tablets’ operating system is up-to-date.
After pressing the button with the magnifying glass icon, with the recorder powered on, wait at least 60 seconds. Some phones take longer to discover and pair with bluetooth accessories.
Restart both the phone/tablet and the recorder.
If there is another phone/tablet available, try that one to rule out that there is an issue with the recorder.
When pairing the Nonin WristOx2 Model 3150 with the SleepImage App, follow these instructions:
- Open the SleepImage App. If you are not taken to the pairing screen, go to the Settings tab and click “Connect New Recorder”.
- On the back of the Nonin, slide the battery door open and remove one of the batteries for 3 seconds.
- Replace the battery and close the battery door.
- Click the scan button (magnifying glass icon), in the SleepImage App.
- Place a finger into the Nonin sensor to power on the recorder.
- Your recorder should appear in the scan as “Nonin3150_123456789”.
- Click the button with the chain-link icon.
If the Upload Status does not show as “Completed” after more than 1 minute, (1) shut down the SleepImage App by swiping up on the carousel showing open apps, (2) verify that your phone is connected to the internet, (3) open the SleepImage App again.
Switching from WiFi to cellular, or vice-versa, may also solve the issue.
If recording is not active when you wake up in the morning, it’s possible that a problem occurred that halted the recording prematurely. Contact your healthcare provider, before you return your recorder, in case they want you to repeat the sleep study.
If you have experienced a failed recording, consider using a different mobile device if available, preferably an Apple iOS device.
If “ERROR 4” is displayed on the CheckMe O2 screen, the sensor may be damaged.
- Press and hold the power button on the CheckMe O2 for 10 seconds.
- Wait 10 seconds.
- With the sensor plugged in to the CheckMe O2, turn on the CheckMe O2.
If the screen still shows “ERROR 4” contact your healthcare service provider for a replacement.
FAQ
The app needs this permission because a Bluetooth scan can be used to gather information about the location of the user. This information may come from the user’s own devices, as well as Bluetooth beacons in use at locations such as shops and transit facilities.
The SleepImage App does not record, track, or share the user’s location. Android requires that we ask for this permission to notify you, because the Bluetooth technology can be used for location services.
When you sign in to the SleepImage App, you enter your SleepImage Patient Id and Date of Birth. Patient Id is stored in the app while the DOB is only used to verify that you entered the Patient Id correctly. The Patient Id is a randomly generated identifier. As a result, all physiological data in the SleepImage App is de-identified for security reasons.
The SleepImage App does not store any personal identifying information.
